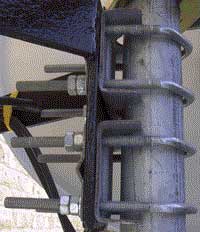
Use a sprit level or angle meter to make sure the the pole is vertical in both planes.

Then put the pole through the clamps and tighten the nuts up.

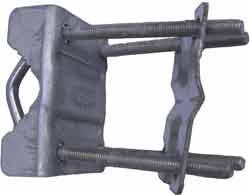
Place the U clamps through the wall mount and screw the nuts on a bit.

The two U clamps are used to fix the pole to the wall mount.


Satellite Dish Wall Mount Installation
Fixing the satellite dish wall mount is a two person job.
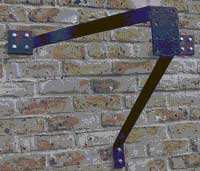
Once you have found a suitable position, mark the position of the top left bolt hole in the left plate, drill a suitable hole in the wall and, supporting the mount, bolt it to the wall. Tighten the bolt enough so that it supports the weight of the wall mount but allows it to rotate around the bolt.
Place a sprit level across the two upper legs of the wall mount and move the right leg up and down until the sprit level is horizontal. Spend some time on this as once it is correct a lot of the problems in locating and pointing the dish to scan the arc accurately will be solved.
Mark the position of the lower right bolt hole in the right plate. Drill a hole and fix the mount to the wall. You can then drill and fix the mount on the remaining six bolt holes in the top left and right plates.
Check that the plate that the pole will be fixed to is vertical with a sprit level or angle finder and if necessary, adjust by moving the bottom leg up and down slightly. If the wall is not vertical you may need to put some washers or spacers behind the top or bottom bolt holes. Mark the position of the bottom bolt hole in the lower leg and fix it to the wall. Then drill and fix the mount on the remaining bolt hole in the lower leg.
Assemble the satellite dish wall mount
© 2005-2025
A Fielding
All Rights Reserved